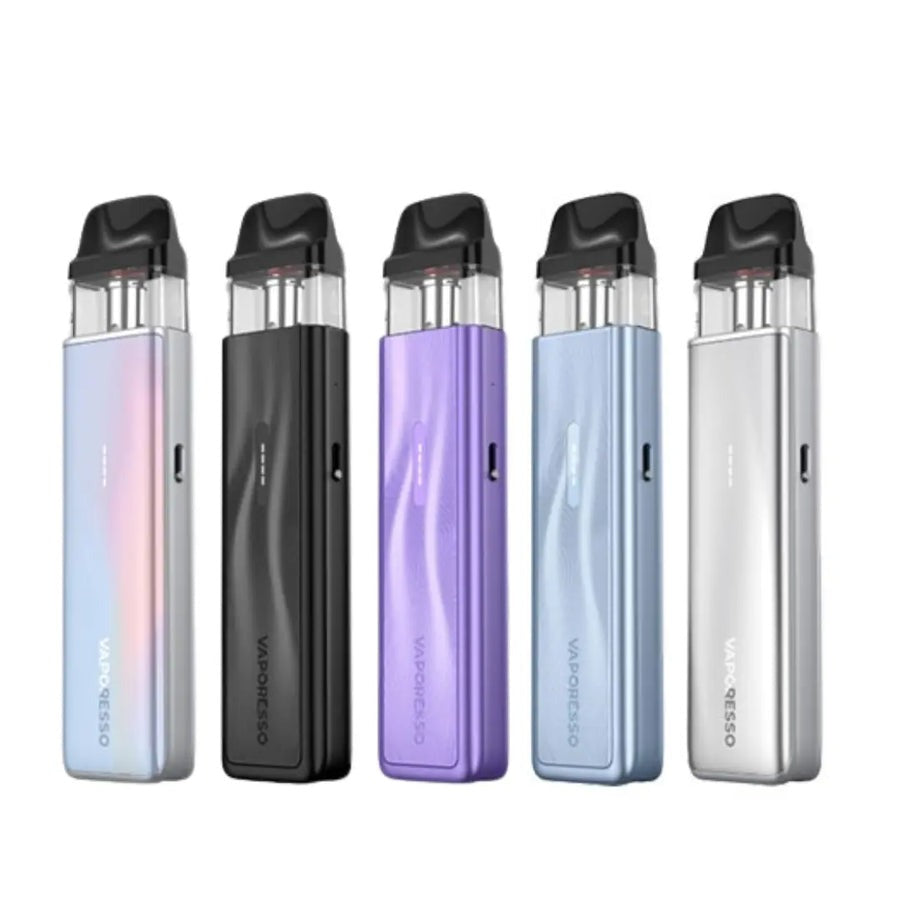
Meet the Vaporesso GTX Go 40
Today I’ll be talking about one of my favourite devices; the Vaporesso GTX Go 40. This is a wonderful device as it’s easy to use so it is perfect for beginners and is a pretty powerful little device.
Pros
-Little and lightweight
-Works well with a majority of e-liquid
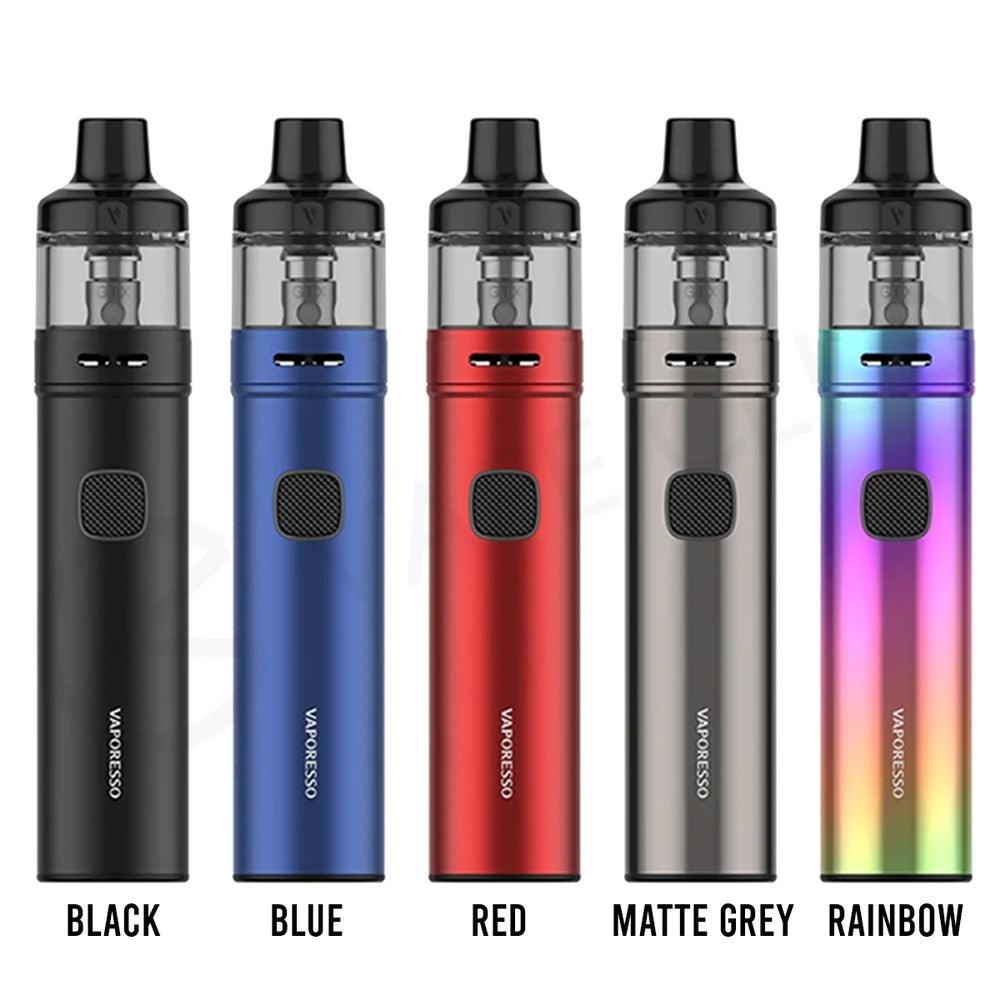
-Comes in a range of colours
-Coils allow for great cloud and flavour
-Allows for sub-ohm vaping
-Easy to set up and use
-Adjustable airflow
Elaborating further on each of my points; the GTX Go 40 is compact, small, and lightweight which makes it perfect for day-to-day life as you won’t be lugging around a heavy device. It fits right in your pocket! As well as it is all of these things it is also pretty powerful and can let off a decent amount of cloud. I always say it is like a big vape in a little vape!
It also can work well with a lot of different types of e-liquid, ranging from nic salts (the majority being 50/50 VG/PG or 60/40 VG/PG) to 100ml nicotine-free e-liquid (the majority being 70/30 VG/PG or 80/20 VG/PG). Although, the flavour intake is dependent on the coils you use with the device. It takes the GTX mesh coils in 0.3, 0.6, 0.8, and 1.2 ohms. Each coil works best with different wattages, allowing for different clouds and different strengths of flavour from whichever e-liquid you choose to use with it.
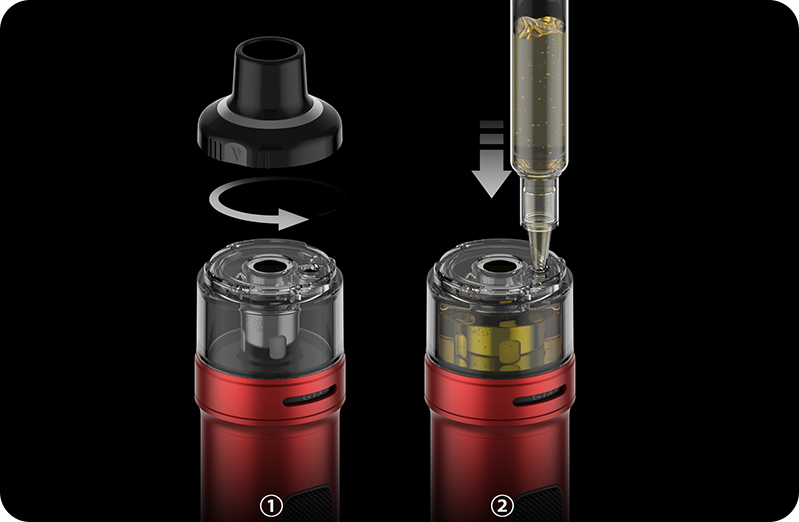
The adjustable airflow is also a massive advantage with this vape as it is really easy to adjust to your preference. You just twist the pod in the device and see which works best for you! I know this isn’t a massive deal for a lot of people, but it is for me. The colours! If you prefer a more plain, sophisticated look, black or grey is perfect for you. Or if you prefer the other end of the spectrum and love a pop of colour then the rainbow is right up your alley. Or, if you prefer a little bit in the middle, they also come in a beautiful blue or a refreshing red. When you buy the GTX Go 40, you’re buying a kit. This comes with the device, one pod, one coil, a type C USB charging cable, a user guide if you are ever stuck with anything and a warranty card. It is really easy to set up, all you need to do is prime the coil, put the coil into the pod fill up the pod with e-liquid by twisting off the mouthpiece and then pop the pod into the device, adjust the airflow to your preference and away you go!
My personal favourite nic salt e-liquids to use in the GTX Go 40 are the bar salts available here or the WAM salts available here. I also really like to use short-fills in my GTX Go 40, such as the brand-new Ice Bomber range (I particularly love the apple ice, but they all are phenomenal) or the Fruity As Fu*k range which is all 0mg nicotine, but you can always purchase nicotine shots available in standard nicotine, ice nicotine, or nicotine salt, which you can put into your short-fills if you need that nicotine in them. They all work wonderfully with this device.
There is no screen on this device, so you cannot tell exactly how charged your device is, but the fire button does flash different colours to indicate the charge level; green means it is 100%-70% charged, blue means is it 70%-30% charged and red means it is 30%-0% charged.
To turn the device on and off you will need to click the fire button 5 times rapidly. You’ll need to hold the fire button to drag on this device. It is not recommended to hold this button for more than a few seconds at a time and to make sure it is turned off when not in use. I would say this device takes around an hour to fully charge up. It is also not recommended to leave this on charge for too long.
Overall, I couldn’t recommend this device enough. I was struggling to find the best device for me for a while and I haven’t looked back since I got this! On top of all of this, it’s cheap!
If everything I’ve covered hasn’t sold you, you’ll be glad to find out you can purchase this device for only £20! If you think this may be the right device for you, you can purchase it here.
Happy vaping, Hollie!
#keepitcloudy #vapefam
Related Posts

Vaporesso Armour Ultra Range: The Ultimate Durable 100W Vape Kit, Mod & Tank

IQOS & TEREA Sticks Explained: A Modern Alternative to Smoking in the UK

Seriously Clear Nic Salts Now Available: Clean, Crisp Flavour Without Compromise

UK Vape Tax 2026: What the New E-Liquid Tax Means for You

The Vape Escape: Helping Smokers Make the Switch with Confidence

Easter Bank Holiday Opening Hours – The Vape Escape (April 2026)

Voopoo Drag S3 vs Drag X3: Which Vape Kit Should You Choose?